这是我参与11月更文挑战的第1天,活动详情查看:2021最后一次更文挑战
需求描述
在最近一次的实际生产项目中,需要紧急开发一个全屏播放窗体,设计大概是这个样子:
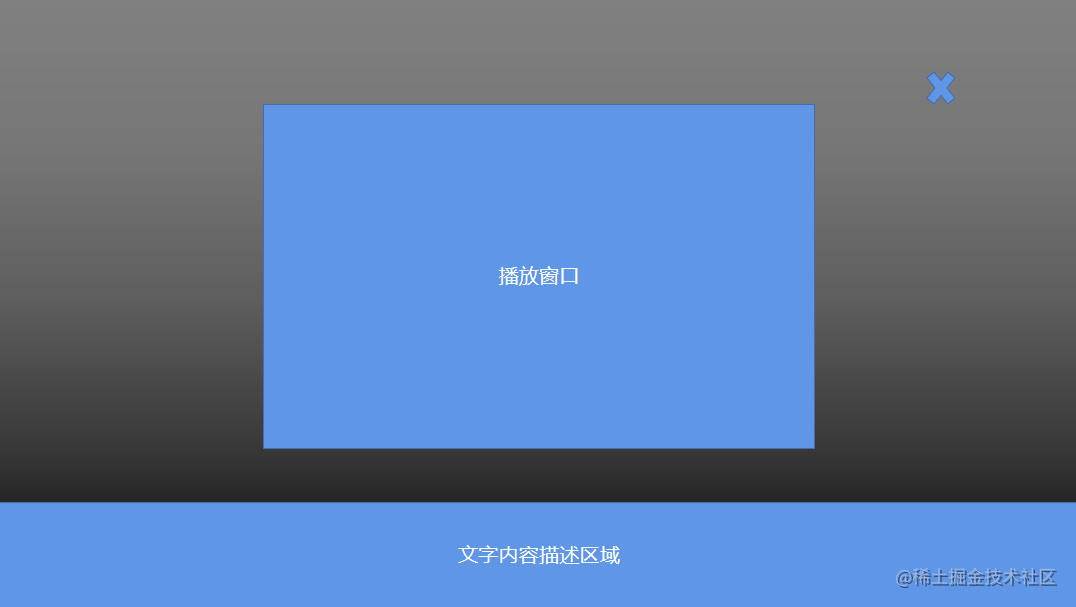
需求描述为,点击视频或图片,将其放大或者播放在上图中的播放窗口中;下方区域居中显示对于图片或者视频的描述文字;黑色背景区域显示为覆盖全屏的黑色半透明窗体;右上角有播放关闭按钮,关闭后即关闭整个播放区域和黑色窗体背景;并且要求覆盖浏览器的返回按钮,返回时效果同点击关闭按钮。
z-index的思路
最直接的想法,写一个组件,调用时组件的z-index设置为一个比较大的值。但是实际上,z-index使用是有局限性的。
在MDN官方文档中,z-index属性设定了一个定位元素及其后代元素或 flex 项目的 z-order。 当元素之间重叠的时候, z-index 较大的元素会覆盖较小的元素在上层进行显示。
需要注意以下几点:
z-index只在当前堆叠的上下文中的层级,不同父元素的子元素之间进行显示时,会根据父级元素的z-index进行渲染;
可以为负值;
必须在position属性为:relative, absolute, fixed, sticky中才生效;
因此,有时单纯为了修改层级,而避免修改DOM的position还需要为z-index添加单独的DOM元素,甚至无法添加;当然,更多情况是,页面元素复杂,单纯使用z-index可能需要逐级修改父级的z-index,改动和记录量较大。
也是因此,我们放弃了这一单纯使用z-index的思路。(实际是单纯使用z-index没有达到预期效果,总有几个东东在飘在页面上方,手动狗头,所以不单纯是告诉大家,也是自己做一下记录)
body.append思路
即,创建组件时,改变组件的父级节点,直接将组件挂载在最外层的DOM树——<body></body>上,话不多数,上关键代码:
1
2
3
4
5
6
7
8
9
10
11
12
13
14
15
| mounted() {
this.$nextTick(() => {
const body = document.querySelector('body')
if (body.append) {
body.append(this.$el)
} else {
body.appendChild(this.$el)
}
})
},
destroyed() {
const body = document.querySelector('body')
body.removeChild(this.$el)
},
|
通过上述代码,将该组件与系统现有的复杂层级组件抽离,从而达到置顶显示覆盖的最终效果。给自己点个赞!
通过这一思路,我们可以打开思路,即通过JS随意调整组件的挂载位置与层级,开不开心^_^。
完整代码如下:(其中一些class没有列出来,只是页面布局相关,如项目统计的左右边距,就不贴出来了)
1
2
3
4
5
6
7
8
9
10
11
12
13
14
15
16
17
18
19
20
21
22
23
24
25
26
27
28
29
30
31
32
33
34
35
36
37
38
39
40
41
42
43
44
45
46
47
48
49
50
51
52
53
54
55
56
57
58
59
60
61
62
63
64
65
66
67
68
69
70
71
72
73
74
75
76
77
78
79
80
81
82
83
84
85
86
87
88
89
90
91
92
93
94
95
96
97
98
99
100
101
102
103
104
105
106
107
108
109
110
111
112
113
| <template>
<div class="popContainer">
<div style="width: 100%;height: 100%;" class="flex-col-center-end">
<div class="main-area top-info center" style="height: 88%">
<div style="width: 100%;height: 75%">
<slot name="main" />
</div>
</div>
<div class="bottom-info main-area center">
<slot name="bottom" />
</div>
</div>
<el-image :src="require('./叉.png')" class="close-icon pointer" @click="close" />
</div>
</template>
<script>
export default {
name: 'ModelFullScreen',
data() {
return {
show: false
}
},
watch: {
show() {
this.$emit('input', this.show)
}
},
created() {
this.show = this.value
},
mounted() {
this.$nextTick(() => {
const body = document.querySelector('body')
if (body.append) {
body.append(this.$el)
} else {
body.appendChild(this.$el)
}
console.log(body)
})
// ----------------------------后退相关------------------------------------
// 挂载完成后,判断浏览器是否支持popstate
if (window.history && window.history.pushState) {
window.history.pushState(null, null, document.URL) // 这里有没有都无所谓,最好是有以防万一
window.addEventListener('popstate', this.goBack, false)
// 回退时执行goback方法
}
},
destroyed() {
// const body = document.querySelector('body')
// body.removeChild(this.$el)
// 页面销毁时,取消监听。否则其他vue路由页面也会被监听
window.removeEventListener('popstate', this.goBack, false)
this.goBack()
},
methods: {
close() {
const body = document.querySelector('body')
body.removeChild(this.$el)
this.$emit('close')
},
goBack() {
const body = document.querySelector('body')
if (body) {
body.removeChild(this.$el)
this.$emit('close')
}
window.history.pushState(null, null, document.URL)
}
}
}
</script>
<style scoped>
.popContainer {
position: fixed;
top: 0;
right: 0;
bottom: 0;
left: 0;
overflow: auto;
margin: 0;
z-index: 50000;
background: rgba(0, 0, 0, 0.9);
}
.close-icon {
position: fixed;
top: 10%;
right: 10%;
z-index: 50001;
}
.top-info {
width: 100%;
flex: 1;
}
.bottom-info {
width: 100%;
background: black;
color: #AFAFAF;
height: 12%;
font-size: 14px;
font-family: PingFang SC;
font-weight: 400;
}
</style>
|